Ever tried to visualize a scene while listening to sci fi audiobooks or reading any criminal novel? Have you ever sketched a scene from your favorite book or movie? Ever wondered how a script turns into a film?
In this article, we will talk about the most important part of any media project, be it a film or a commercial video. It is storyboarding which helps you visualize your script before the finished version.
In a film, not just characters’ dialogues are important, but their actions are also crucial for the audience to follow the story. Here, storyboards come into play, they help filmmakers visualize the story of the film or any media project through the series of images so that they get an idea of the final result.
Storyboards are very useful in visualizing the scenes you want to shoot. However, many filmmakers and media teams avoid storyboarding due to their limitations to technical knowledge, fear of drawing & formatting, and budget concerns.
But now, storyboarding does not have to be stressful. In this article, we have listed all the important steps that will help you in making a storyboard in no time.
Step 1: Script, Marking & breakdown
Firstly, start with gathering all the important details of every scene of your story. Details like physical space, staging action, blocking, costume, location, props, etc are all the key elements that will affect the storyboard. In this phase, the breaking down of the script is done.
Earlier breaking down and marking the script would be done by highlighters and pens on a printed version of the script. Today, in a digital world, there are lots of software to break down the script easily.
Import your script to a storyboard software, and automatically get all your scenes lined up. Finally, click-and-drag to identify all the key elements in the script. While going from one scene to another, analyze the screenplay and determine how you want each scene to look and how you want to shoot it.
Step 2: Finalize the aspect ratio
While storyboarding a script, there are a lot of framed boxes involved. Determining how big those storyboard frames should be is a very important step in the process. Creating a good storyboard panel depends a lot on the aspect ratio- the size and shape of the frame of your camera.
The most common aspect ratios are as follows:
- 16:9-TV and online videos
- 1:1- Square videos for Instagram and Facebook
- 4:3- non-widescreen TV standard
- 1.85:1- for film dramas and comedies
- 2.39:1- extra widescreen for action epics
- 3:2- 35mm digital SLR format
If you are using any software, then you can easily upload an image to preview the look of the frame. In this way, you can pick the aspect ratio which works best for your project and start designing the storyboard image for that size.
Coming on to the number of frames per row for a storyboard, there is no exact answer to that. If it is fast-paced scenes like a car chase, then four frames per row might be beneficial so you can fit as much as possible on a single page. While, if it is a slower-paced scene with a major focus on the details of the image, then two or three panels would be sufficient.
Step 3: Sketch the subjects and objects of your script
After finalizing the aspect ratio, it’s time to get into the so-called difficult part of the storyboarding, sketching out the characters and objects of your script.
Now you either go old school for that, by actually sketching using a pencil and a piece of paper or you can go with the technology and use a storyboard software. If you are a true artist, you will surely prefer the traditional way of sketching, but there are a lot of other dimensions to it that need more than paper and pencil.
Organizing, sharing, rearranging, adjusting, getting input, and tweaking the sketches is very critical in a storyboard and for that, you will need good software. It would be a lot more efficient if you manage your storyboards online as it would be easy to share, get input, track, and make changes.
Step 4: Drawing background
In addition to a subject or character, a background in the image is also important to orient viewers. The background can be as simple as a line or can be elaborate as the layered, complex scenery.
The panel that focuses on characters or character movement does not need an elaborate background. One of the important things while designing a storyboard is to give viewers a sense of space.
Step 5: Indicate motion on the screen
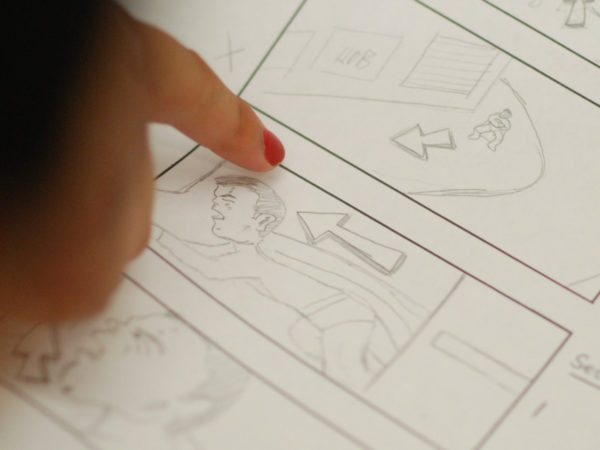
Adding arrows to the images in your video storyboard, commercial previsualization, or movie storyboard indicates motion on the screen. These arrows show the direction in which the characters are going in a frame. A simple arrow perfectly depicts the movement in an image that would otherwise have taken a million frames to show.
Step 6: Camera movement
Camera movement sets up how we see the action. Adding the movements of the camera to the storyboard pre-visualize how, when, and where the camera will move and on what it will focus. Specific camera movements like a close-up or a wide shot matter a lot in making a storyboard.
Different types of shots:
- Close up
- Upshot
- Down shot
- Point of view shot (POV)
- Over the shoulder
- Mid shot
- Wide shot
- Establishing shot
- Extreme close up
When you add camera movement to a storyboard, the software will select the shot type, shot size, and lens details as well. Another feature that you get with storyboard software is to use rack focus in your storyboard. With this feature, you can easily shift the focus within a fixed frame.
With good storyboard software, you can easily share your work online and check if the arrows are getting the point across or not. You can also sub out the image for a clearer one.
Step 7: Number your shots
You should label all the shots with numbers, starting at 1. Without labels, it would become very confusing for the team and crew to understand the flow of the images in a storyboard. With labels, it also becomes quite easy to reference specific shots.
If you are using labeling with storyboard software, then your frames will get auto-numbered for you. However, if you are doing the labeling manually, then make sure to number every shot and double-check for any human error. If there is more than one storyboard for the same shot, then you would label them 1A, 1B, and 1C.
Step 8: Organize and share
Finally, it is time to take your finished storyboards and share them with your team. If you have done it in the old school style with a lot of spreadsheets, photocopies, and loose images, then you better start organizing early as it would be time-consuming. While if you are using the cloud-based storyboard software, then sharing would be quite easy. You can easily share access to the storyboard with anyone who you want to be in the loop.
Why is it good to storyboard your video?
A storyboard is a valuable tool that helps you visualize your video beforehand. Here are the benefits you get to enjoy by storyboarding your next video:
- Time-saving- There are many aspects involved in creating a professional video. Working on a video without a clear outline might result in miscommunication, which will eventually require a lot of meetings to keep everyone on the same page. Storyboarding is the best tool to keep all the team members in sync with each other.
- Money-saving-Storyboard is an important tool to finish the video job with less revision. It remarkably reduces the number of changes needed in production. Moreover, everyone will have a clear understanding of what will be required to achieve the desired result beforehand.
- Improves quality- All the energy that you would have invested in revisions will be focused on creative thinking and detail-oriented improvements. This will eventually take your project to the next level.
Conclusion
A storyboard basically exists to help you turn your vision into finished work and share it with others for useful inputs. Storyboarding might be a daunting task in filmmaking, especially for those who do not have drawing skills.
Despite how frightening a storyboard seems to you, it is actually a useful tool to help make your film or commercial even better.


