Accounts
Signup & Login (Troubleshooting)
- Use the Chrome browser.
- Disable ad blockers and any other extensions.
- Clear Cache & Cookies
- On your browser toolbar, click the 3 dots in the top right, then More Tools and then Clear Browsing Data.
- In the “Clear browsing data” box, click the checkboxes for Cookies and other site data and Cached images and files.
- Choose beginning of time to delete everything.
- Click Clear browsing data.
How to Reset Your Password
To reset your password:
- Click the “Forgot your password?” link.
- Enter your email and submit. Leave window open.
- Check your email for a verification code.
- Go back to the “Password Reset” window.
- Enter your verification code and new password then submit.
How to Cancel Your Subscription
You may cancel your subscription at anytime.
- Login to your Plot account.
- Click ‘Billing’ in the top right.
- Click ‘Cancel Subscription’ at the bottom of the popup and confirm.
If you get an error message, please contact us with the email address of your subscribed account and we’ll take care of it.
What’s the Difference Between Free & Premium?
We are currently in an early stage pricing program. Meaning these rates will increase as features are added, but active subscribers will be grandfathered in. Lock-in your price today!
Premium is $10/mo or $90/year (25% off) per user and includes: unlimited projects, unlimited scenes, unlimited collaborators and unlimited exporting.
Free accounts are allowed to create 1 project with 8 scenes. All other features are available for testing.
See a visual comparison here.
Collaboration
How to Share Your Project
Play VideoTo share your project:
- Login and open your project.
- Click the menu by your project name at the top, then click ‘Share’.
- Add collaborators using their e-mail. They’ll receive an e-mail invite. When they create an account, the project will then be visible on their Dashboard.
Optionally, you can create a ‘Public Link’ which will make your project visible to anyone with that link.
How to Share Public Links
Play VideoPublic links are only available to premium accounts.
How to Invite Collaborators
Play VideoTo invite collaborators:
- Login and open your project.
- Click the menu by your project name at the top, then click ‘Share’.
- Add collaborators using their e-mail. They’ll receive an e-mail invite. When they create an account, the project will then be visible on their Dashboard.
- Switch between “Can Edit” or “Can Comment” permissions with a click.
Features
How to use the Drawing Tool / Image Editor
Projects
How to Share Your Project
Play VideoTo share your project:
- Login and open your project.
- Click the menu by your project name at the top, then click ‘Share’.
- Add collaborators using their e-mail. They’ll receive an e-mail invite. When they create an account, the project will then be visible on their Dashboard.
Optionally, you can create a ‘Public Link’ which will make your project visible to anyone with that link.
How to setup Script & Images
How to Upload Images
There’s 2 ways to get images into your project:
Drag & Drop
You can upload images to your project’s library by dropping the files from your computer onto the browser window. Once uploaded, they’ll be available in the image toolbar on the right side and you can place them into scenes. You can also drop image files directly into the drawing tool to make it an editable layer.Copy & Paste
You can copy images from any other website, and paste them directly into the drawing tool as an editable asset. The steps are:- Right click an image from any website.
- Click ‘Copy Image’ from the menu. If that option doesn’t appear you may need to click on the image first.
- Open the drawing tool in Plot, right click and ‘Paste’.

How to Print / Export PDF
Play VideoTo export your storyboard to a PDF:
- Login and open your project.
- Click the menu by your project name at the top, then click ‘Print’.
- Type a description and click ‘Preview’.
- Then select ‘Save as PDF’ as the printer. (Works in both Mac & PC)
 Sample PDFs (in order from left to right)
Scenes
How to use the Drawing Tool / Image Editor
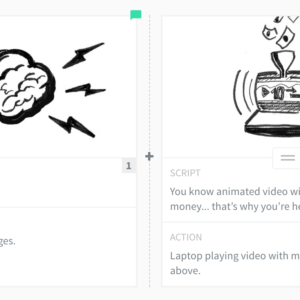
What is the ‘Action’ row for?
The ‘Action’ row can be whatever you want, but the idea is that it’s where you describe what’s moving in that scene. Only text in the ‘Script’ row will appear in the text column on the right toolbar.
How to Add Scenes
To add scenes, you can:
- Click the blank scene with the “+” sign.
- Use the shortcut “Ctrl+Enter” to split script text into a new scene.
- Hover to the left or right of an existing scene and click when you see the dashed line.
How to Move Scenes
To rearrange scenes, just hover your mouse on a scene then click and drag on the handle between the image and script to a new location.

Tips & Tricks
How to Get Started
These video tutorials cover everything you need to know in less than 15 minutes.
Keyboard Shortcuts
If there is a specific action you’d like to have a shortcut for, let us know!
MAC
- Command + Enter: Split text into new scenes.
WINDOWS
- Ctrl + Enter: Split text into new scenes.